Developing an application isn’t that something that only developers are doing? Yes, I can imagine that this is your first response. However, I have learned that this is not true. I was inspired by my co-worker Django Lohn to explore the potential of PowerApps. I soon figured out that a PowerApp can utilize Microsoft Flow, which can exchange web-API call like “get, update or post or delete” ( Graph API ).
So I started modifying endpoint manager (Intune) resource via code requires knowledge of the Graph API. In this blog, I describe the steps that you can take to create your first custom connector. The custom connector is a part of the PowerApp to exchange data. Don’t be scared to follow the steps; I didn’t any experience creating modern workplace accelerators like the PowerApps for autopilot (scan a QR). An inspiration for me is the quote of Mr. Roosevelt.
“It is common sense to take a method and try it. If it fails, admit it frankly and try another. But above all, try something.”
― Franklin D. Roosevelt
Azure Enterprise application
Take one step back; before you create the custom connector you need to have an Azure Enterprise app/app registration. Powerapps like the Intune autopilot scanner app requires an app registration (even in the same tenant). You must configure properties like which API calls are accessible (read/write). Basically, you built a trust-relation between the app and the resources in Azure. The first step is to create an Enterprise application.
| Description | Screenshot |
| Create a new enterprise application | 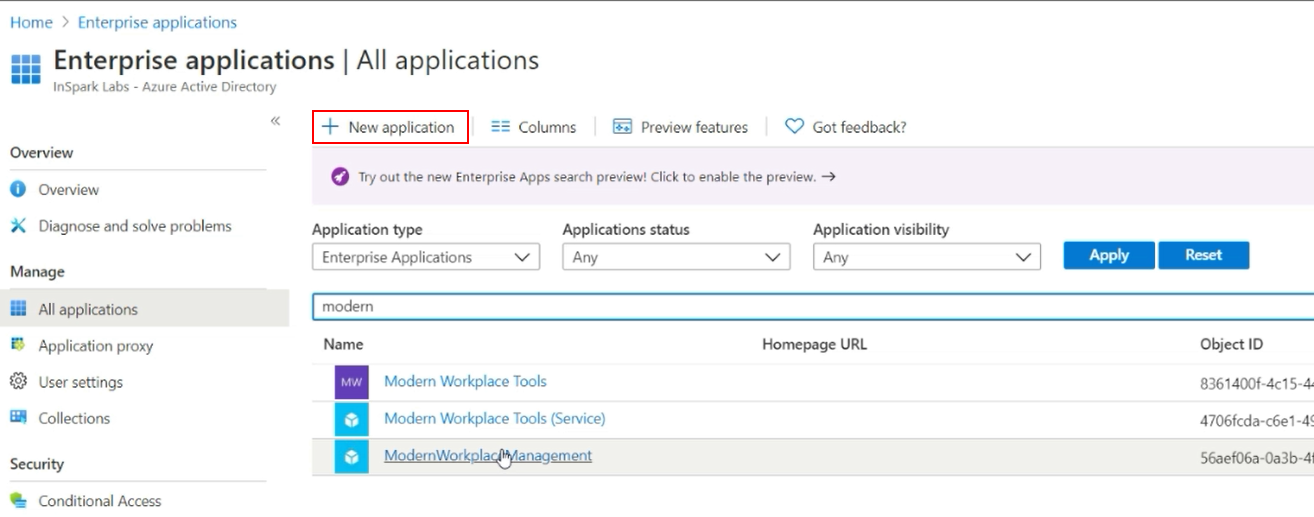 |
| Create your own application | 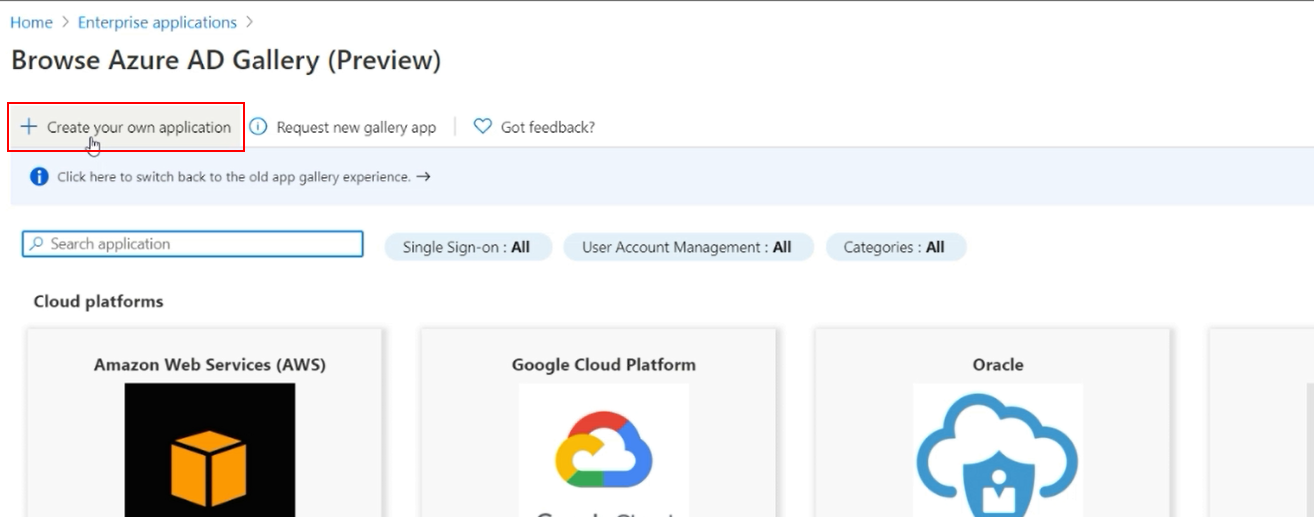 |
| Fill in the name of your application like [WorkplaceAsCode – Custom connector] Choose the option – Integrate with another application you don’t find in the gallery. Click on the button create. The Enterprise app and app registration is created within a couple of seconds. | 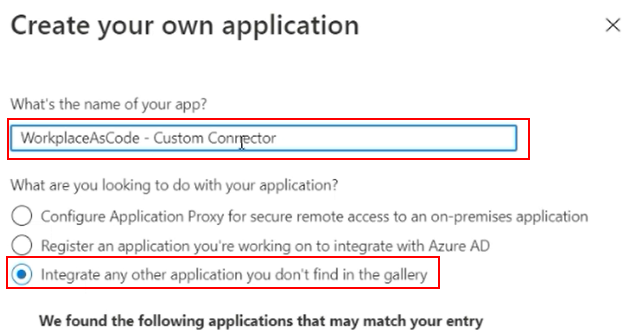 |
| The properties page of the new enterprise application opens automatically. Configure the following options to ensure the PowerApp platform controls who can use and view the application. – User assignment required – No – Visible to users – No | 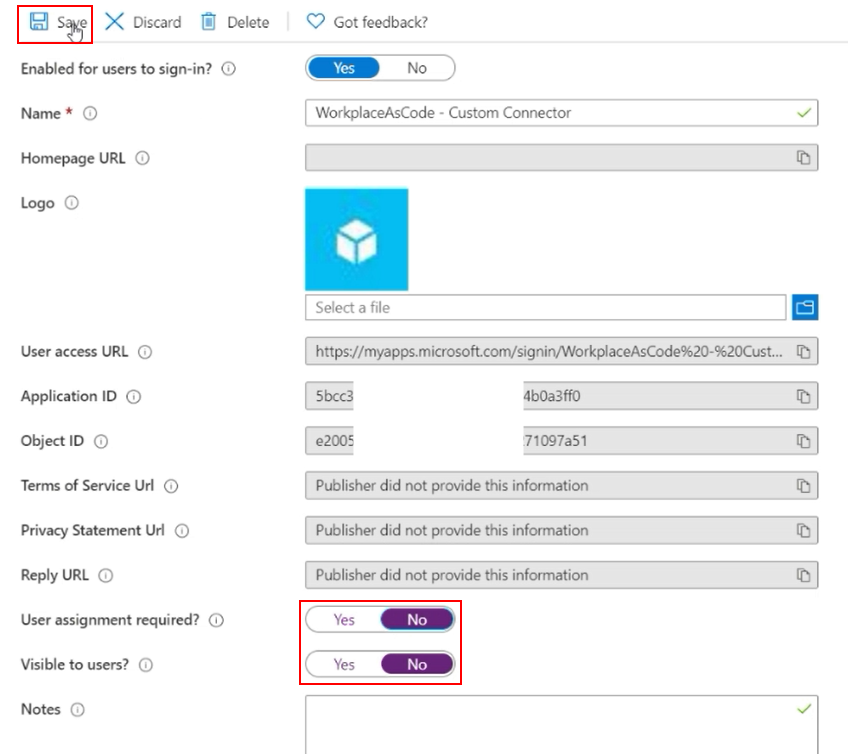 |
Azure App registration
The second step is to configure the App registration.
| Description | Screenshot |
| Open the app registration blade and search for your application. (the name is equal to the Enterprise application). Create a new client security key and save the key. This key is only showed one time! We need this key later when we create the custom connector. | 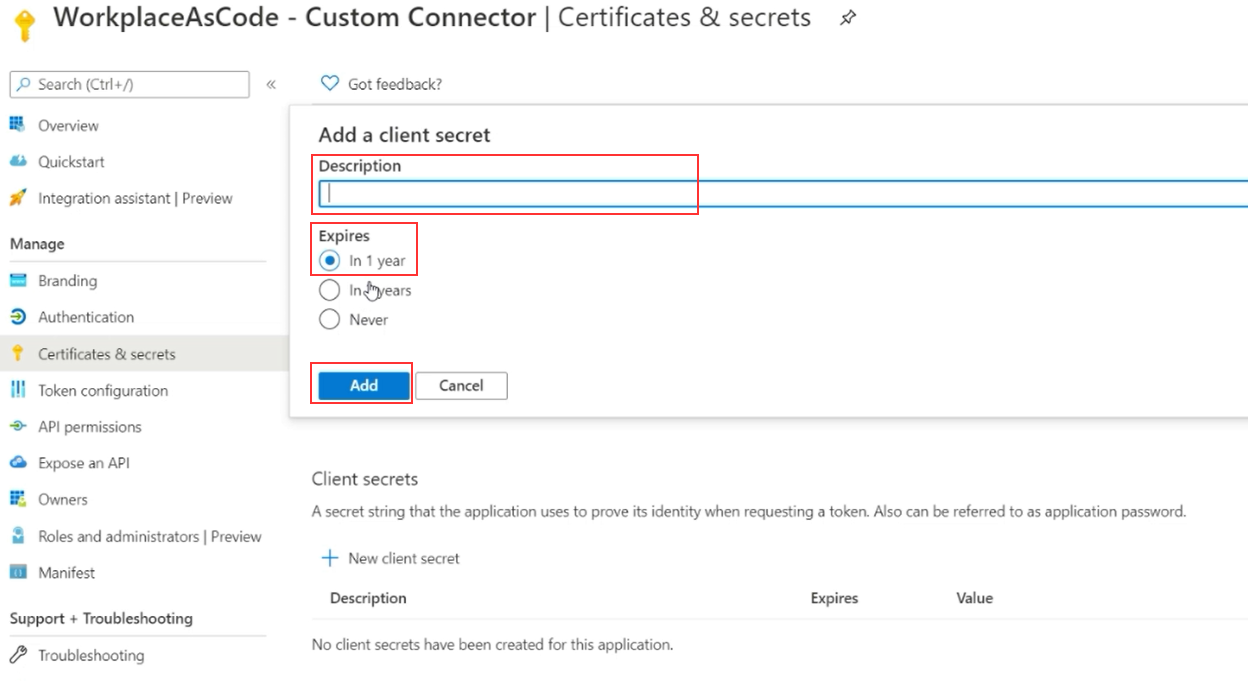 |
| Set the API permissions for the autopilot QR code reader the following are required. – DeviceManagementServiceConfig.ReadWrite.all – Directory.Read.All (Application permissions) – The user authenticates to PowerApp! | 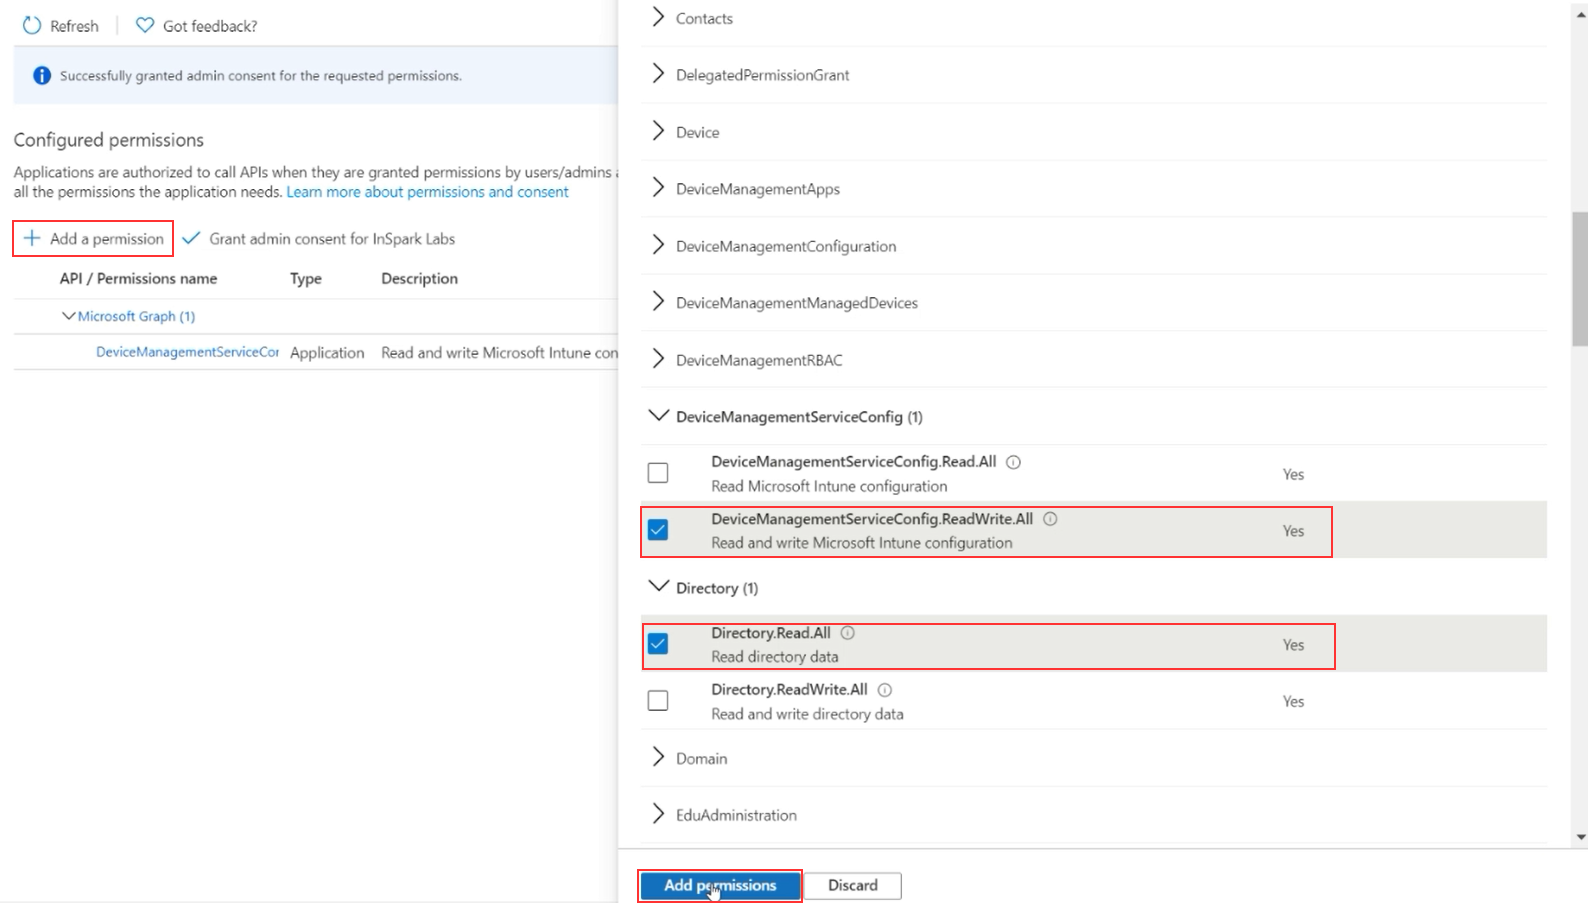 |
| Give the admin content on behalf of the organization, this avoids a scenario where any application user needs to do this. |  |
| Set the authentication for web redirected URL’s to; http://localhost/powerappsgraph -and https://global.consent.azure-apim.net/redirect | 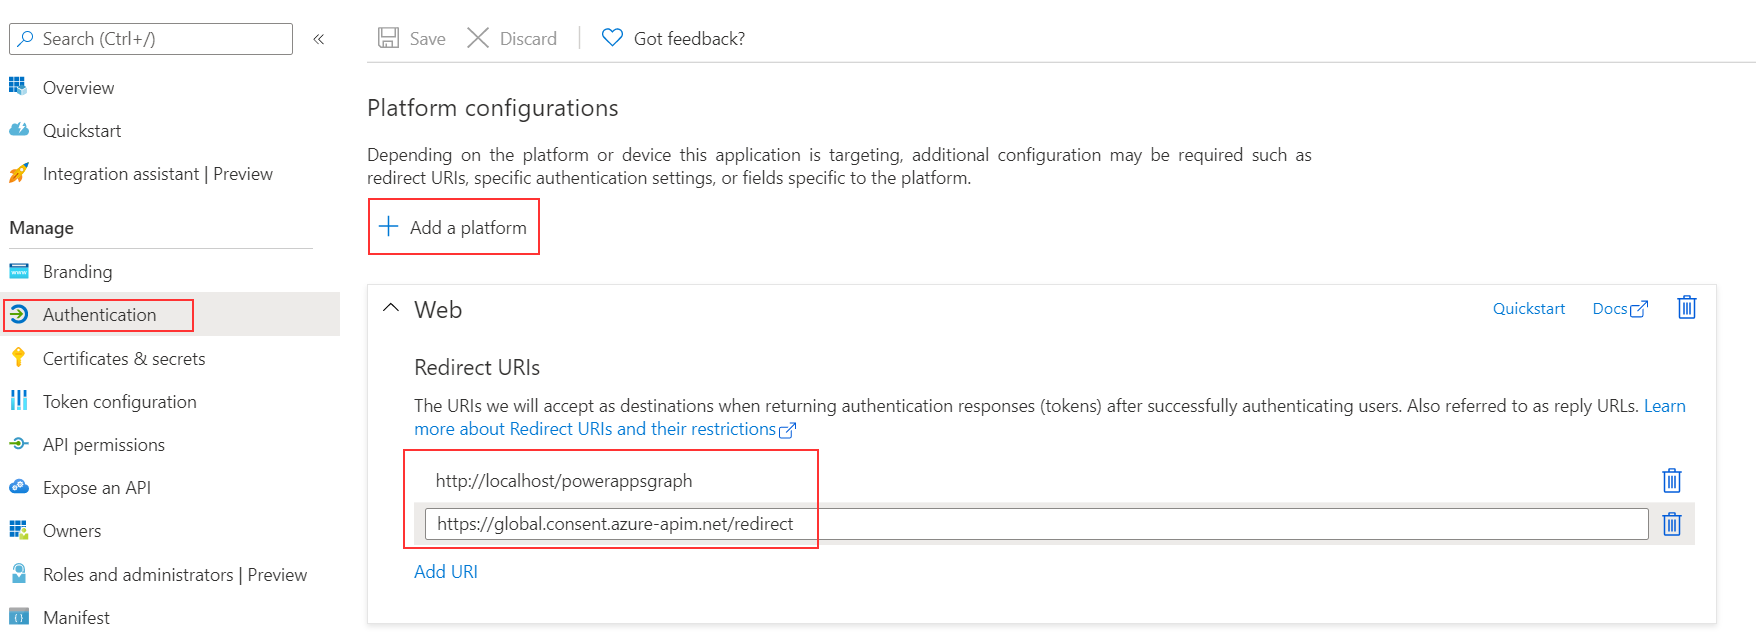 |
Custom connector
I compare the custom connector with glue because it fuses the PowerApp and the Graph API. You can use the custom connector not only for a Power app but it’s also (re)usable for a logic app or flow.
| Description | Screenshot |
| Create a new custom connector from blank. | 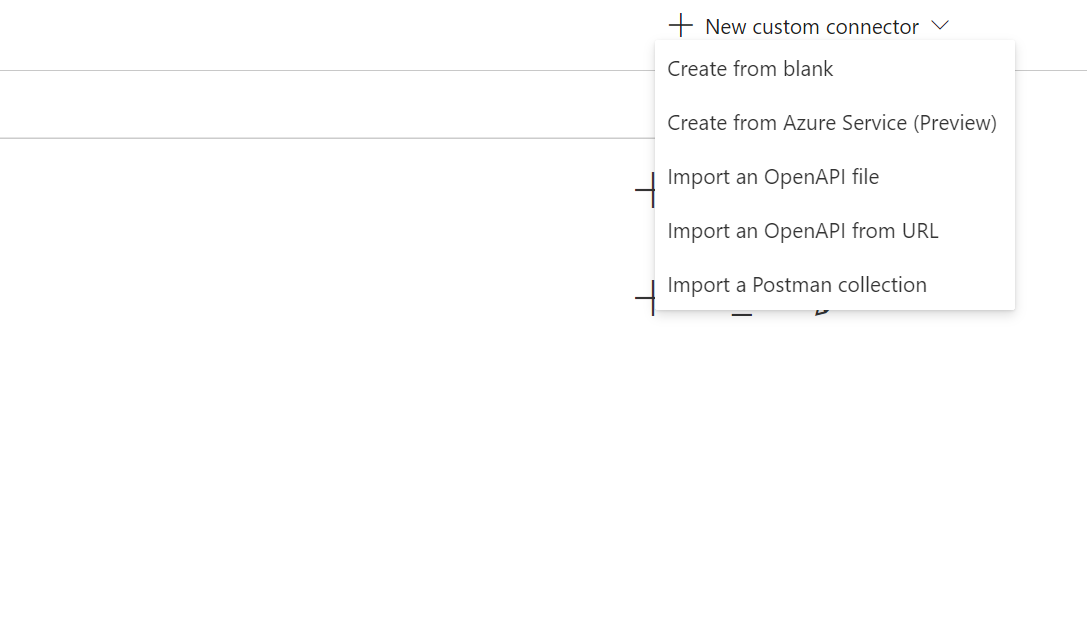 |
| Fill in the general details, only the host is a required field. We want to make a connection to the Microsoft Graph API. The hostname is; graph.microsoft.com | 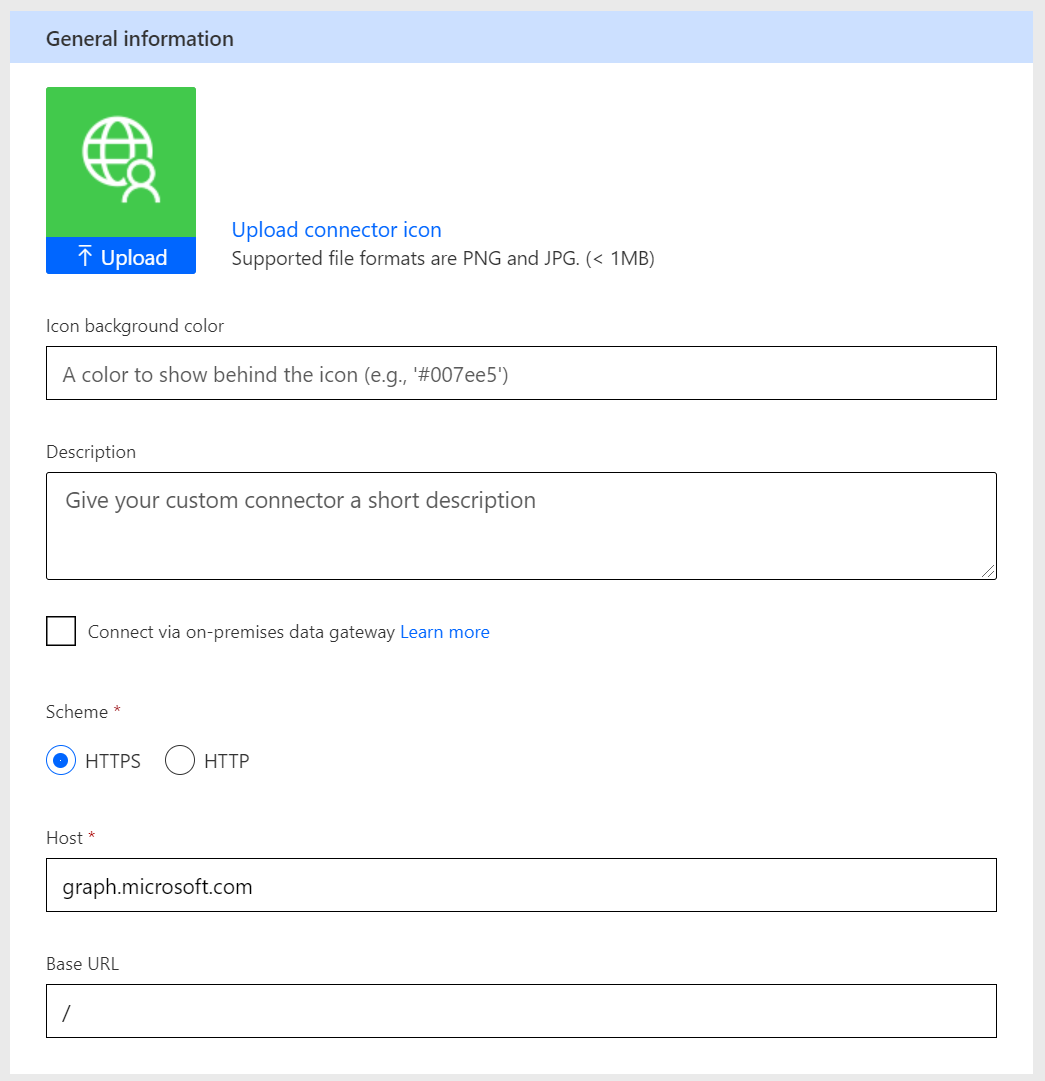 |
| Security is important to avoid for example accidental removing workplaces In the previous chapter you configured the API permissions. On this page, you need to choose the authentication type and OAuth 2.0 details. Authentication type = OAuth 2.0 Identity provider = Azure Active Directory Client ID = The application ID of the app registration Client secret = The client secret created in the previous step Login URL = https://login.windows.net Redirect URL = https://global.consent.azure-apim.net/redirect | 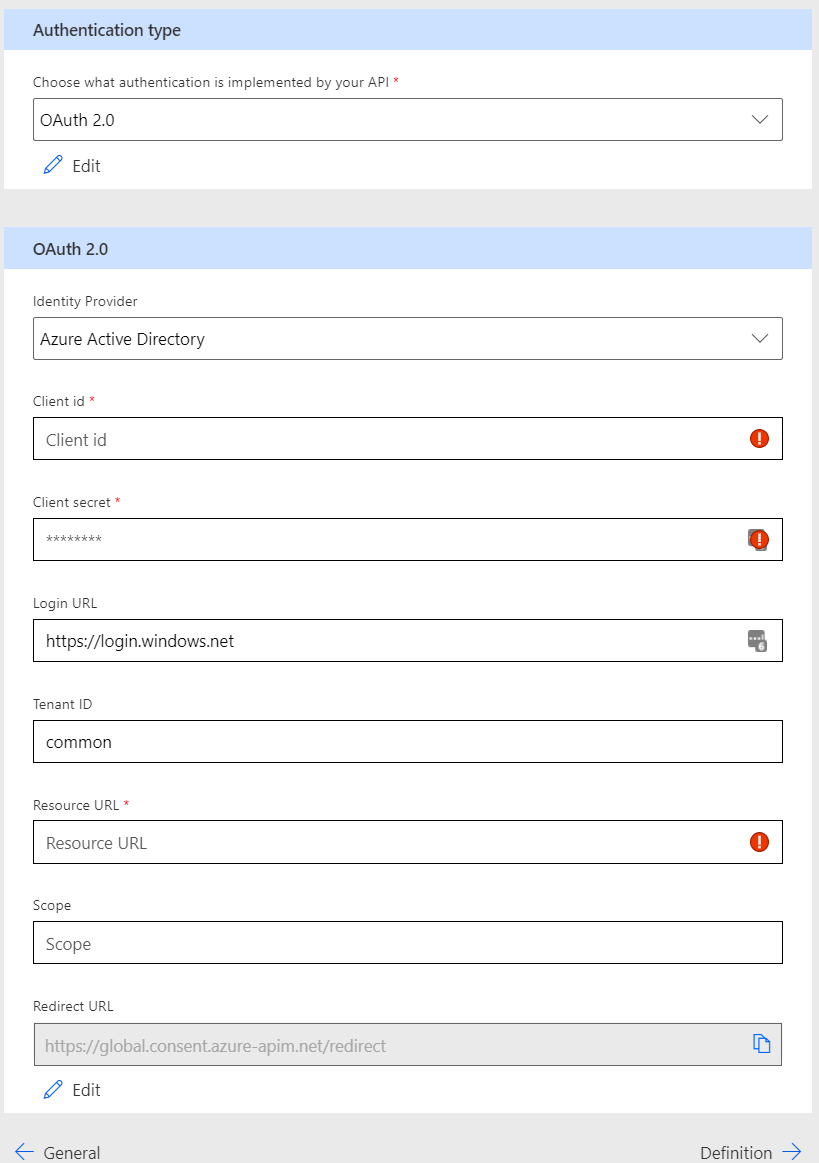 |
| This is an important step because you need to determine the operations that users can perform. In the autopilot QR code reader application, we need three definitions. Definition 1 – Get All autopilot devices General Summary = GetAllAutopilotDevices Description = GetAllAutopilotDevices OperationID = GetAllAutopilotDevices Request Type = Get URL = https://graph.microsoft.com/beta/deviceManagement/ windowsAutopilotDeviceIdentities Response Default | 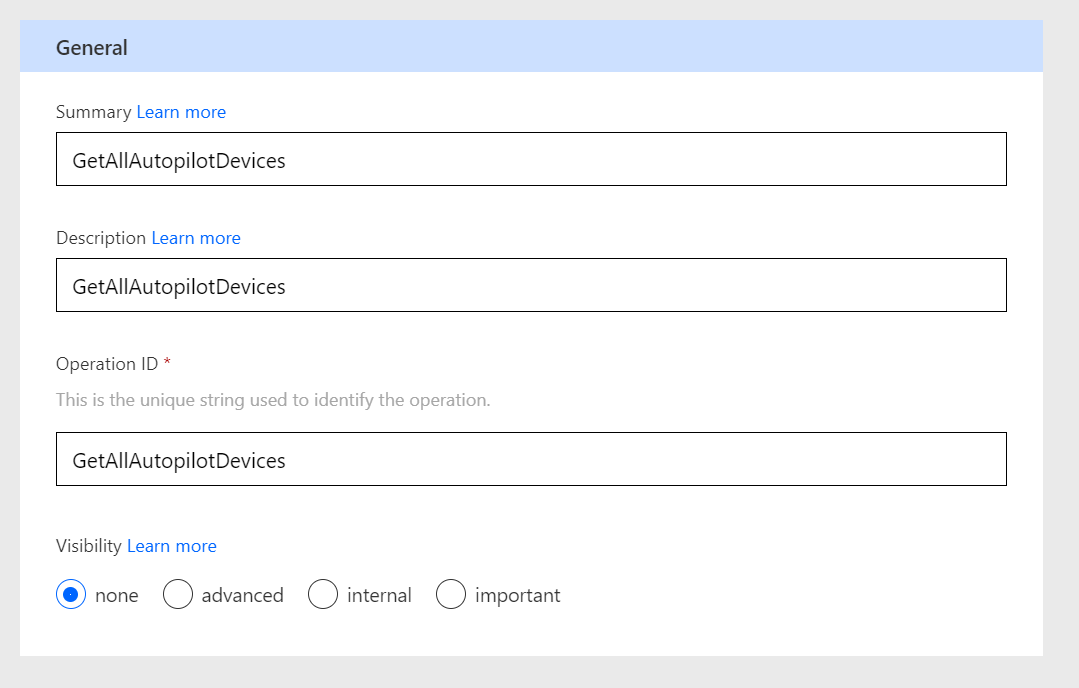 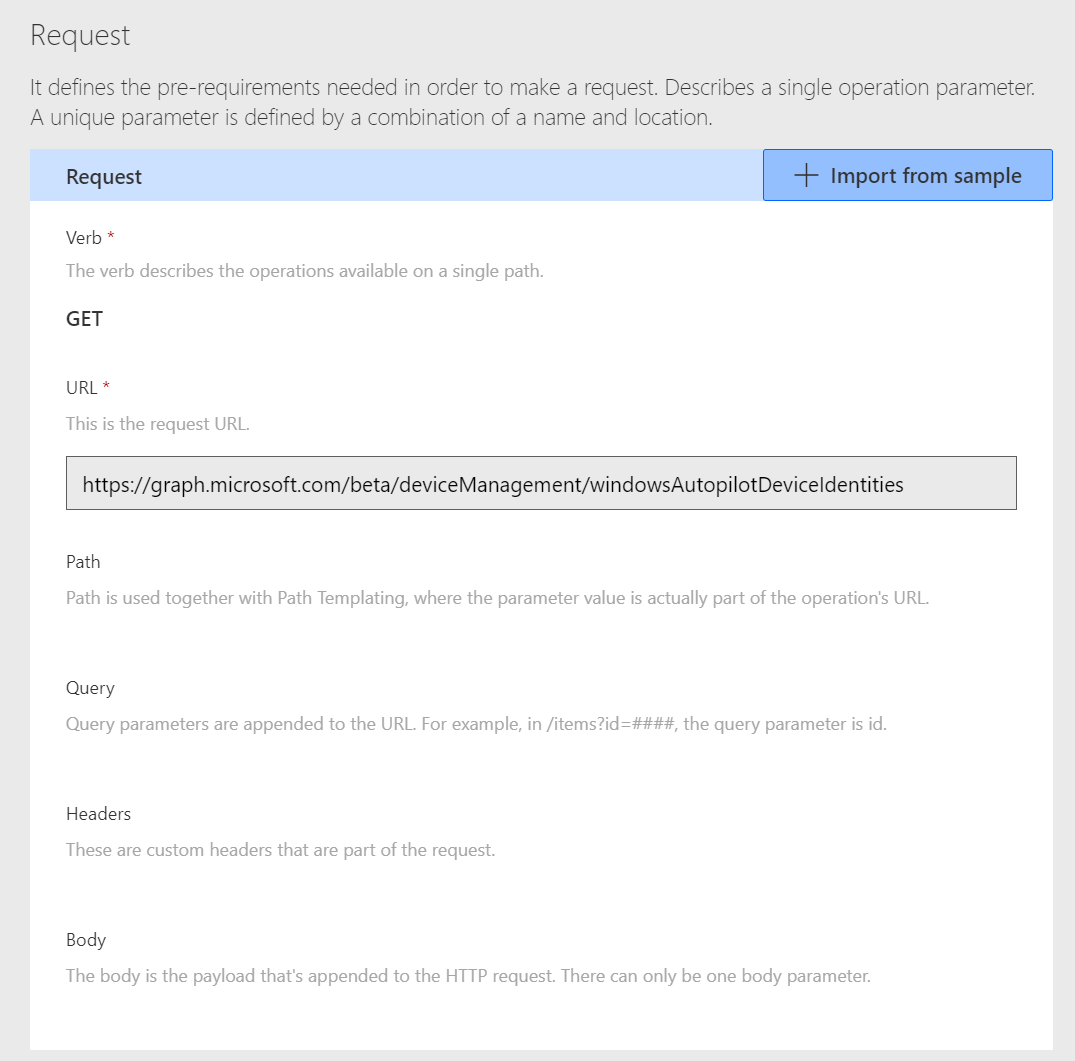 |
| Definition 2 – Get all users General Summary = GetAllUsers Description = GetAllUsers OperationID = GetAllUsers Request Type = Get URL = https://graph.microsoft.com/v1.0/users Response Default | 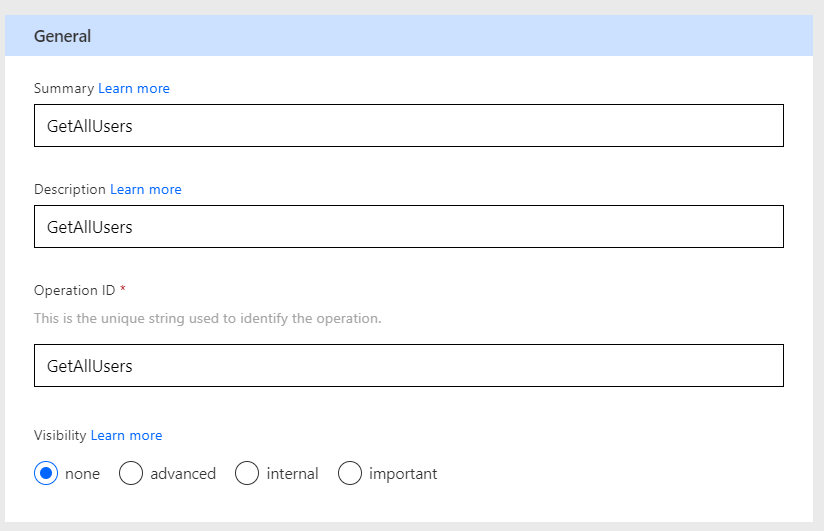 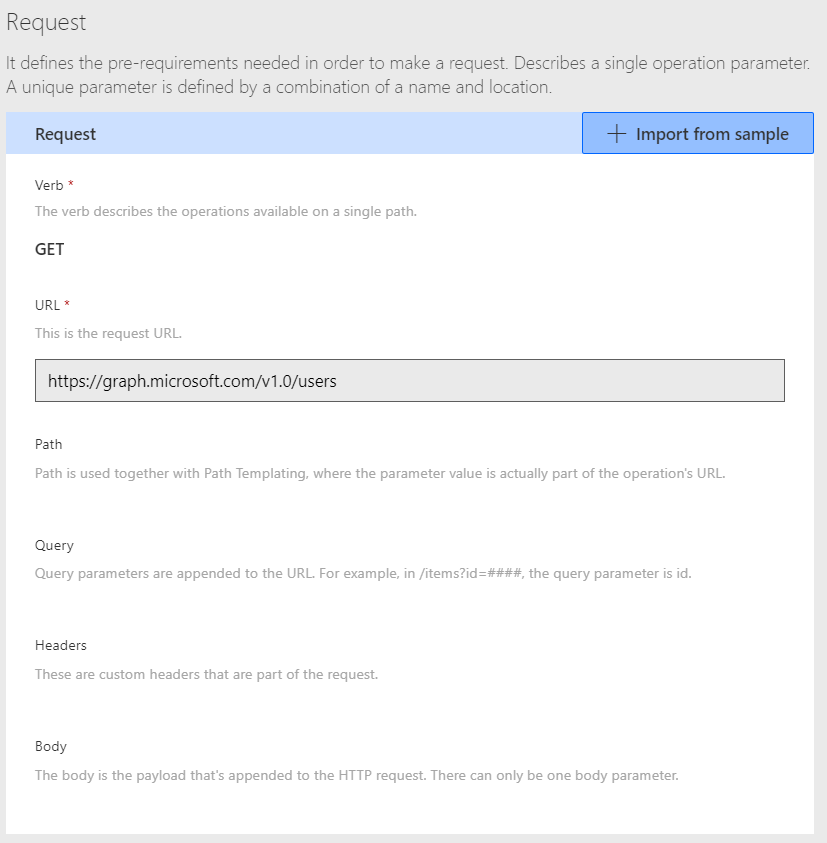 |
| Definition 3 – Update autopilot devices General Summary = UpdateAutopilotDevice Description = UpdateAutopilotDevice OperationID = UpdateAutopilotDevice Request Type = POST URL = https://graph.microsoft.com/beta/devicemanagement/ windowsautopilotdeviceidentities/{AutoPilotDevice}/ UpdateDeviceProperties Path = AutopilotDevice Body = body (required Grouptag + userPrincipalName) Response Default | 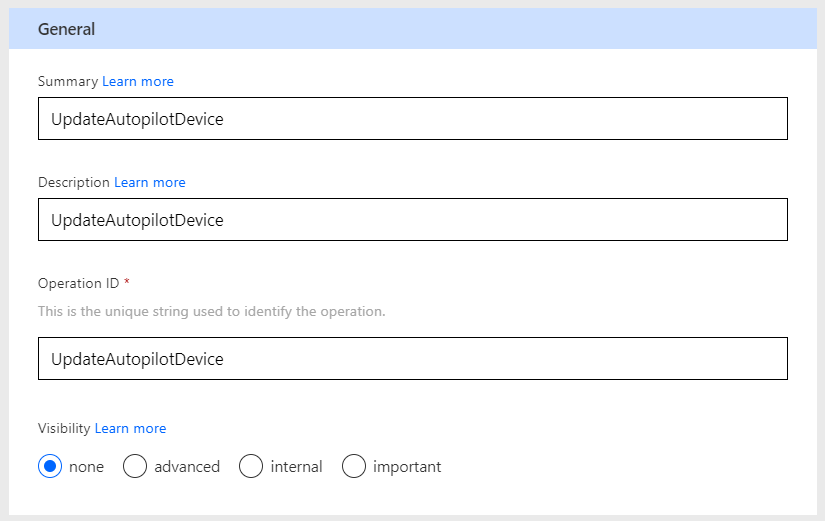 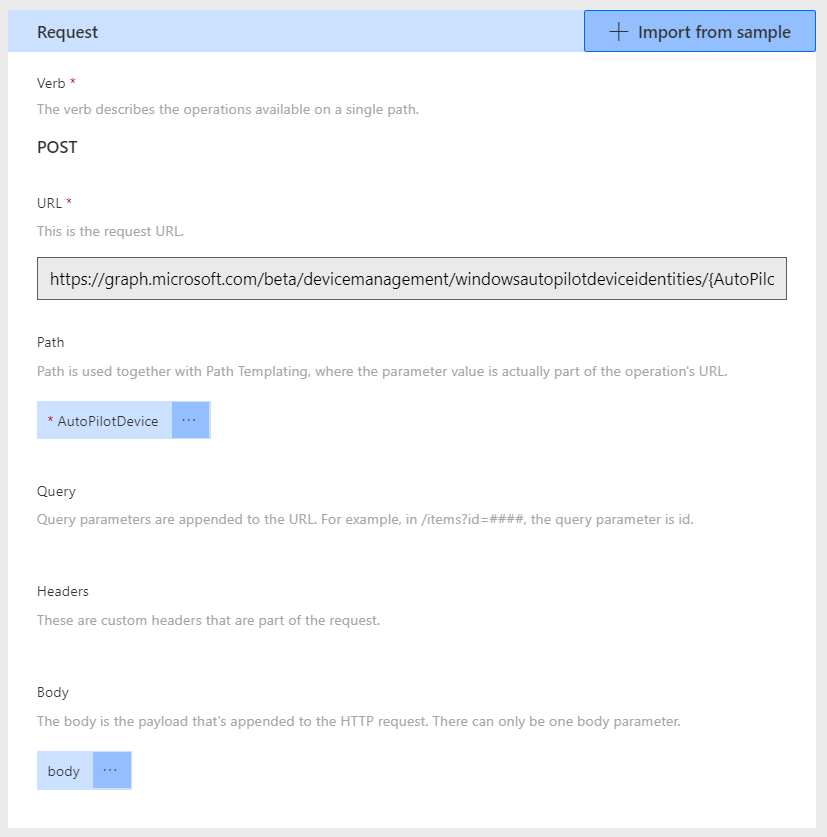 |
Summary
Creating a custom connector for the first time is difficult. However, the process is straight-forward. There are many potential scenarios where you can use a custom connector to make workplace management via Intune easier.
💡 What do you want to automate to simplify modern workplace management? I encourage you to share your ideas with me.
